
LUMOS
spectral simulation
Version 1.14
LUMOS allows for simulation of the spectral light distribution in interiors. It is available as open source MATLAB code under BSD 3.0 license.
LUMOS setup with Matlab:
- Get the Lighting Toolbox from here.
- Download LUMOS and move it to a location of your choice.
- Start Matlab
- Add LUMOS to Matlab’s search path:
- Type: “addpath(genpath(‘path_to_LUMOS’))” in the command window
- Or click “Set Path” button under Matlab HOME tab -> “Add with Subfolders…” -> select LUMOS folder -> confirm -> “Save”
- Test the Lighting Toolbox functionality:
- Type: “plotciexy” in the command window
- A plot of the CIE x and y chromaticity should appear
- Start LUMOS by:
- Type “LUMOS” in the command window,
- or open the “spec_simulation.m” script file and click on the Run script button.
LUMOS quickstart:
LUMOS workflow is from left to right in the tab menu.
Create a room geometry (in room menu):
-
- Select the “sketch room layout” tool in the toolbar
- Click in the 2D view to start drawing
- Set room points with left mouse button, to close the polygon click again on the start point.
- Alernative: right click in list on the left side and add a new room
- You can adjust the room layout by editing the table
- Right click in the table to delete or add points
Add windows (in room menu):
-
- Select the “add windows” tool in the toolbar
- Select any room surface in the 3D view, this surface will be displayed in the 2D view. You can rotate the 3D view with the rotate tool in the toolbar.
- In the 2D view, use the left mouse button to add a window corner
- Move the mouse to the desired opposite window corner and add the window using the left mouse button again.
- You can adjust the window by editing the table, make sure you selected the corresponding window in the list on the left side.
Add Objects (in object menu):
-
- Use the “add object” tool in the toolbar to add new objects. Added objects are initially cubes and will appear at the same position.
- You can change the object positions by selecting the room in the list on the left side and editing the table.
- You can edit the object geometry by selecting the object in the list on the left side and editing the table. Use the right mouse button to add or delete polygon points.
- Use the right mouse button in the table to add or delete polygon points.
- You can group and ungroup objects using the “un/group objects” tool.
- You can copy objects, save them and load them with the corresponding tools in the toolbar.
- Note: LUMOS uses the radiosity approach and computation time increases significantly with increasing geometry complexity.
Add materials to surfaces (in material menu):
-
- First add materials to the project by using the “add materials” tool in the toolbar. You can select multiple materials in one go. Materila data is provided in txt file format. First row give the wavelengths, the second row the spectral reflectance or transmittance for windows.
- After loading the materials, these will be listed in the table.
- To apply a material to a surface, first select the surface in the list on the left side.
- Apply any material by checking the selection box of that material in the table list.
- You can edit the integral reflactance of the material in the “rho” column for that surface.
- You can apply one material to all room surfaces (not windows) by selecting the room in the list on the left side.
- Each surface must have a material assigned, windows without material are treated as opening without material.
Add daylight data (in sky menu):
-
- Daylight data is optional.
- First load daylight data by using the “load sky data” tool in the toolbar, you can select multiple files in one go.
- Note: LUMOS calculates the entire scenes for each daylight data set, and so increasing computation time.
- Daylight data is provided in txt file format for Tregenza hemisphere data with 145 patches row-wise. First row gives the wavelength, the next 145 rows give the spectral radiance of the 145 Tregenza patches.
- The Lighting Toolbox function specsky can be used to create spectral daylight radiance data for testing purposes.
Add lumnaires (in luminaire menu):
-
- Artificial lighting is optional.
- First add luminaires by using the “add luminaire” tool in the toolbar.
- You can change the luminaire position by selecting it in the list on the left side and edit the table.
- Load luminous distribution curves with the “import EULUMDAT” tool in the toolbar. LUMOS supports currently only EULUMDAT .ldt files. You can load multiple files in one go.
- Load spectral luminaire data using the “import luminaire spectrum” tool in the toolbar. You can load multiple files in one go.
- You can use the Lighting Toolbox function ciespec to create standard illuminant spectra. The data is provided in txt file format, the first row gives the wavelengths the second row the spectral power distribution.
- Select a luminaire in the list on the left side and apply the data by selecting a luminous intesitiy distribution and a spectrum for the luminaire. You can display the data by selcting the model or spectrum cell in the table.
Add calculation metrics (in metrics menu):
-
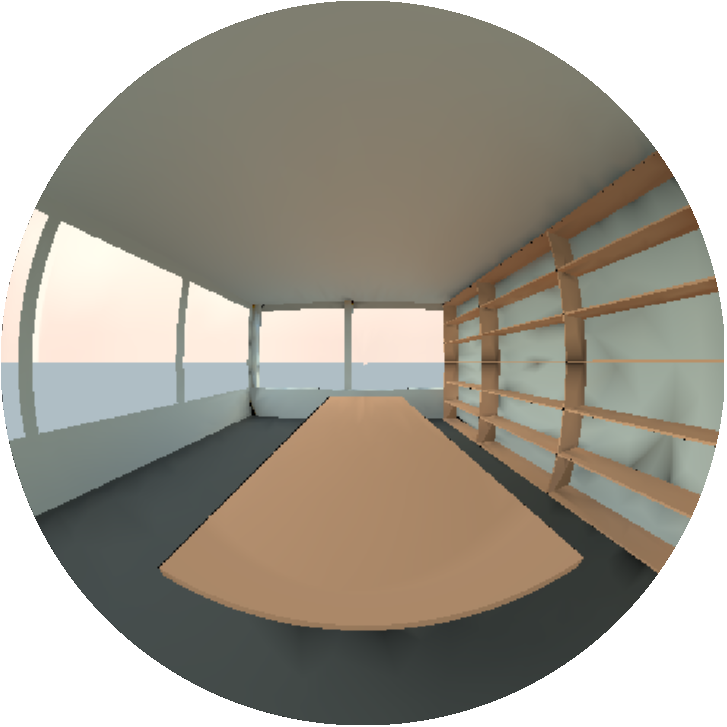
- You can add observers (spectral fisheye image), single irradiance calulation points, Daylight Factor (DF) points and irradiance areas with multiple calculation points by using the corresponding tools in the toolbar.
- Change metric positions by selecting it in the list on the left side and editing the table.
Simulation start and settings (in simulation menu):
-
- Change the simulation settings in the table:
- dens: sets the patch denisty per square meter (roughly)
- refl: sets the number of internal reflecxions
- N°: changes the cardinal north direction
- h: sets the room heigt above ground (currently no effect)
- sim checkbox: enables or disables room in the simulation
- Start the simulation with the “start simulation” tool in the toolbar.
- Wait until simulation is finished, this can take severalhours, depending on the scene complexity. Start with low complexitiy and low densitiy values to get a feeling for the calculation time.
- Change the simulation settings in the table:
View results (in results menu)
-
- Select any list item on the left side to view the corrsponding simulation data.
- You can save any table or image data with the tools in the toolbar.
How to cite:
LUMOS:
Rudawski, Frederic, The spectral radiosity simulation program LUMOS for lighting research applications, In: Tagungsband LICHT 2023 – 25. Europäischer Lichttechnischer Kongress, pp. 110-115, 2023.
Rudawski, Frederic, The spectral radiosity simulation program LUMOS, version 1.14, 2022, DOI: 10.5281/zenodo.7275807, URL: https://github.com/Frudawski/LUMOS
Lighting Toolbox:
Rudawski, Frederic, Lighting Toolbox for Matlab and Octave, 2022, DOI: 10.5281/zenodo.7275778, URL: https://github.com/Frudawski/LightingToolbox
LUMOS accuracy:
Rudawski, Frederic; Knoop, Martine, Validation of the spectral radiosity calculation tool LUMOS in regards to the CIE TR 171 test scenarios for lighting simulation software, In: Tagungsband Lux junior 2021, pp. 225-248, Digitale Bibliothek Thüringen, 2021. DOI: 10.22032/dbt.49331
LUMOS materials:
Rudawski, Frederic; Aydınlı, Sırrı; Broszio, Kai, Spectral reflectance and transmittance of various materials, 2022, DOI: 10.14279/depositonce-11893.22
Changelog:
Version 1.14 – 15.04.2024
- Fixed missing settings error
Version 1.13 – 22.03.2024
Added option menu:
- Mesh optimization option
- Object reflection calculation option
- Consider luminaire surfaces during visibility determination
- Consider objects during visibility determination
- Maximum number of luminaires in subgrid
Version 1.12 – 07.12.2023
Improved luminaire mesh optimization
Added selection option for mesh optimization
Fixed luminaire rotation
Fixed luminaire luminance in fisheye rendering
Fixed luminaire rename bug
Version 1.11 – 11.10.2023
Added missing savefile and loadfile functions
Version 1.10 – 22.08.2023
Fixed bugs in luminaire rotation and subdivision
Version 1.09 – 16.08.2023
Fixed bug in luminaire subdivision of large luminaires if luminaire is rotated
Version 1.08 – 02.06.2023
Fixed error loading new EULUMDAT files
Version 1.07 – 02.06.2023
Fixed error using different wavelengths in simulation
Version 1.06 – 02.06.2023
Fixed rendering error
Version 1.05 – 01.06.2023
Fixed error loading new materials
Version 1.04 – 15.03.2023
Added hyperspectral fisheye image export function
Version 1.03 – 28.02.2023
Fixed errors in newer MATLAB versions
Version 1.02 – 03.11.2022
Readme updated
Version 1.01 – 02.11.2022
removed LightingToolbox submodule as it did not work as expected
Version 1.00 – 05.05.2022
Initial release